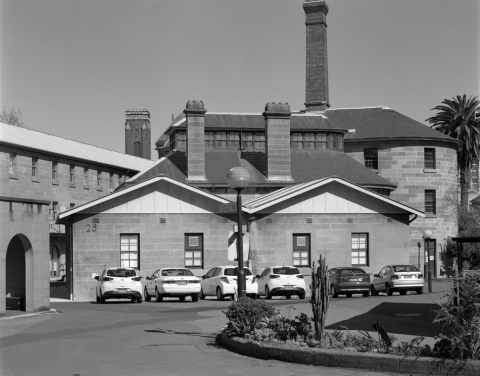
Large Format class, April 2018
April 15, 2018
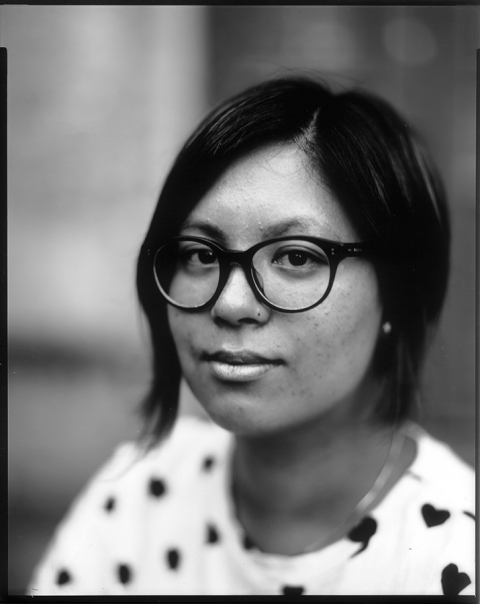
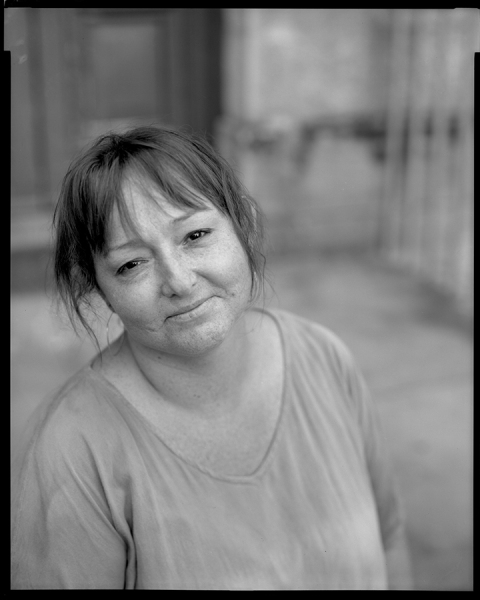
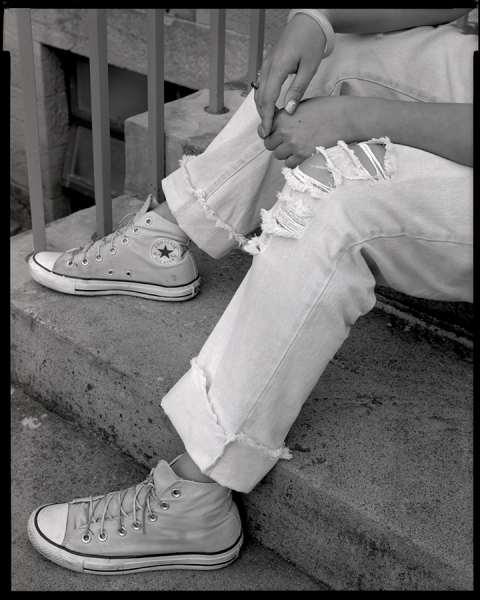
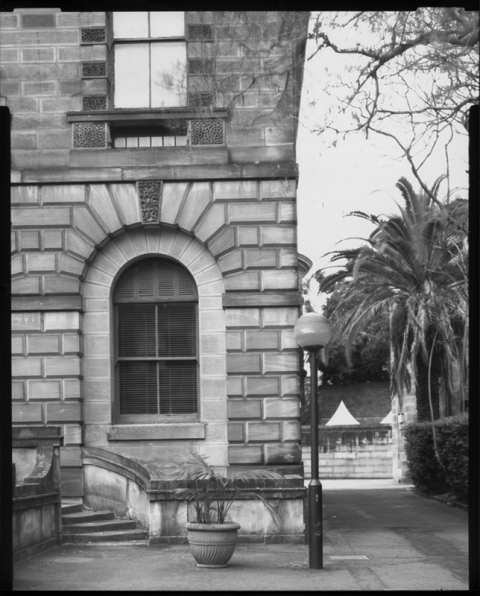
Images and notes from the April 2018 Large Format class taught for ACP at the NAS facility, Taylor Square, Darlinghurst, Sydney. The class goes from 10am to 4pm and is designed as an introduction to 4×5 and 8×10 cameras for those who are curious about using sheet film and view cameras. We use both paper negatives and film during the class, the paper is easy to load and we can process it for a near instant look at the exposures. The film I process after class and load here for students to look at.
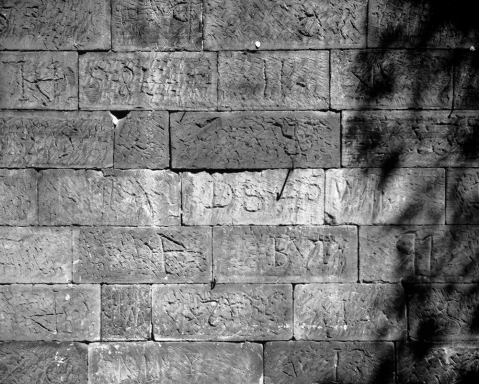
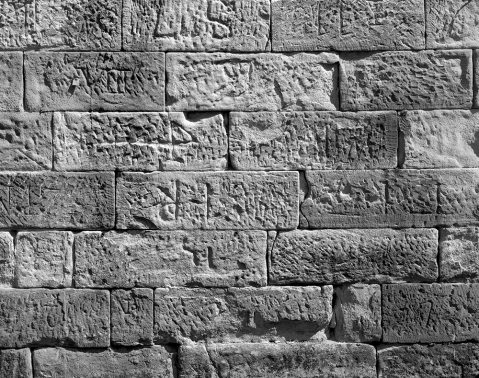
Above is a paper neg that was our first exposure during the initial practical exercise, which is learning to operate the 4×5 camera. The camera was a Chamonix 045N2 with a Fuji 135mm f/5.6 lens. We used Ilford Satin RC paper exposed as if it was ISO 3. The tonal rendering is pretty good for a paper neg although the scene didn’t have a wide range of colour or brightness. NAS is on the site of the 19th century Darlinghurst prison and the sandstone blocks that make up one wall have convict symbols carved in them – these were used to track that each prisoner was meeting their labour quota. The colour of the blocks are pretty much brown and yellow. Below is another section of the wall exposed with the same lens on Ilford HP5 film, processed in D76. The results are not directly comparable as the film photo was taken about one hour later and the sun was at a different angle, but I am impressed by the paper negative.
In the first part of the class we use the 4×5 camera to explore the basic principles of view camera photography, mostly doing architectural subjects but also pointing out how these are also mostly applicable to landscape photography. After lunch we look at the 8×10 camera in relation to portraiture, particularly covering technical considerations around close focusing and discussing how these principles also apply to still life. There is only so much you can cover in one day, we couldn’t practically do all four genres, but I think that by covering two of them in some depth the students should have an idea about how they could work in other scenarios.
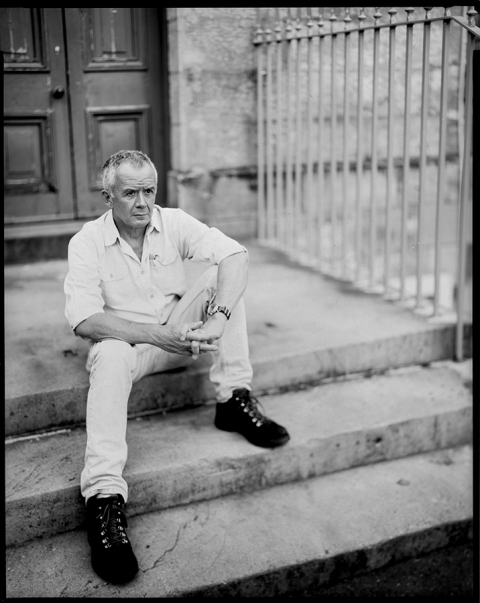
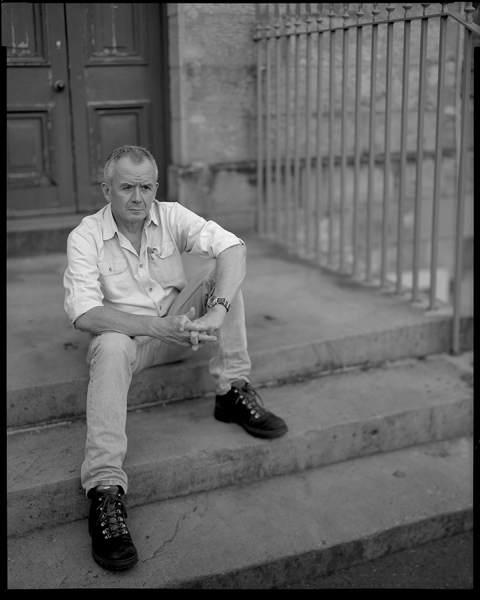
The 8×10 camera is a wooden Deardorff dating from the mid 1960s and the lens we used was a 300mm f/5.6 Rodenstock Sironar N in a Copal 3 shutter. The students get to load the film into the film holders and to make the exposures, pulling the dark slide, cocking the shutter and deciding which moment to expose. Again we did both paper and film negatives and here they can be compared as they were exposed in the same light one after the other.
I like large format film for its lack of grain and smooth tonal transitions. The small depth of field that is possible is also interesting however I don’t like extremely small depth of field, particularly in portraits. With the 300mm lens doing fairly close focusing at f/5.6 as in the examples below, when the eyes were in focus other facial features were quite unsharp to an extent that was a bit odd looking. The results were more acceptable around f/11 so the film portraits were exposed at that aperture while the paper negatives were exposed at f/5.6 to avoid too slow a shutter speed, considering that the paper is rated at ISO 3 vs 400 for the film. So that depth of field difference can be observed here.
In regard to exposure these relative close ups also require us to think about the light fall off due to bellows extension factor. From memory the bellows were extended to about 450mm to obtain the close focus. I use the Reciprocity Timer app to calculate the correction required whereas in the old days I would work it out in my head based on a basic understanding of the inverse square law. In this case we metered the face with a Soligor spot meter, added one stop for bellows extension and one stop to lift the skin tone one stop above a mid tone.
With the photo below we decided to maximise depth of field and closed the aperture to f/64 and the exposure time was 2 seconds. It is not equally sharp from front to back but clearly more depth of sharpness than in the portraits.
Large Format class May 2017
June 24, 2017
In May 2017 I taught a one day introduction to large format photography class at the National art School, Darlinghurst for the Australian Centre for Photography. I followed my usual structure of beginning with a 4×5 camera photographing architecture with paper negs and film negs, followed by portraiture with an 8×10 camera, again with paper and film.
Above and below are the paper and film versions of the same scene. The film was Ilford HP5 rated at 400 and the paper was Foma glossy RC rated at 6. I know it’s better to use matt paper and that it can be flashed to lower contrast, but I couldn’t find any matt and the paper was just an easy way to demonstrate the basic concepts of film loading and processing. The camera was a Chamonix 045-N2 with Rodenstock Apo Sironar N 150mm lens. This is a good, sharp lens but I wish it had more image circle to allow for movements, this is particularly obvious in the photo below that used a fair bit of front rise. The film in the exposure below also has some extreme fingerprint marks – I recall one of the students having a lot of problems getting the film in the holder so i think it was handled with some sweaty and perhaps chemical stained fingers.
Below is a scan of a paper negative made with a 360mm Apo Ronar Rodenstock f/9 lens at f/9 on a Deardorff 8×10 camera.
Below is a scan of the HP5 neg scan. I prefer the pose in the paper neg shot and don’t even mind the extra contrast. That’s the difference between photographing people and objects – things don’t change between exposures, while people can radically change the photo by even a slight movement or change in expression.
Large Format class, Oct 2016
October 16, 2016
(still have some film to develop – will update this when complete)
Paper negative exposed when we were looking at basic movements. This was a 210mm Symmar with a lot of front rise on 4×5 Chamonix 045N2
Deardorff 8×10 with 300mm at f/5.6 and some lens swing
detail showing sharp focus on eye and smooth fall off to out of focus.
paper negative version of above. Foma RC rated at EI 6.
paper negative Foma RC rated at EI 6. Deardorff 8×10 with 240mm lens at f/5.6 and some lens swing.
Above, Deardorff 8×10 with 300mm at f/5.6. Below is the same lens at f/32. Obvious light leak at the top of the sheet. I let the students load the film that they are going to expose, and I remember that when I went into the loading room to check this that the bottom flap of the film holder was up, with the darkslide under it rather than inserted into it, so must have happened then. This was the first time they had loaded any sheet film, let alone 8×10, so little mistakes are allowable – this is a learning process.
4×5 project, August 2016 #8
September 20, 2016
I decided to test some Plus-X I was given a couple of months back. This was an opened box and the film had expired in June 1998. The person who gave it to me had been given it by someone else, however I was told that it had been in a freezer. I was also told that other old film from the same source had worked out OK. I used to like using Plus-X in 35mm and I particularly recall liking it rated at 400 and processed in Diafine. Kodak discontinued Plus-X in 35mm about 2010 or 2011, however the sheet film versions were discontinued around 2005. I rated this at 100 (box speed was 125 but 100 is easy to meter) and processed in Rodinal 1+50 for 13 minutes. It worked out well with low base fog and good exposure. There seems to be about fifteen sheets still in the box so I will work through the rest.
Kodak Plus-X with Symmar 210mm, above and below
The exposure below was made on the same day, just after the top photo, however this was using the last of the Adox CHS II. The lens was a Sironar N 150mm. This and the first photo were done in Surry Hills and the middle one was at Marrickville.
4×5 project, August 2016 #7
September 19, 2016
A simple comparison between Ilford FP4 and Adox CHS II. The films were processed separately as I decided that the CHS II needs a bit more than the FP4 – 9.5 mins vs 9 min in Rodinal 1+50
Above is Ilford FP4 in Chamonix 045N2 with Symmar 210mm.
Below is Adox CHS II everything else the same.
Similar tonality however on the scan I noticed a blotchiness in the sky on the CHS. Nothing to do with the camera as the FP4 was exposed at the same time with the same lens. It’s also not a developing problem as I have another sheet of CHS II processed at the same time that doesn’t show the blotchiness. Detail example below.
Ilford FP4 and Symmar 210mm above, compared to CHS II below. FP4 is a bit more contrasty, however with more development tweaking I’m sure I could make these films look the same. Based on that I will continue to use FP4 and probably won’t buy CHS II again. Not because it’s a bad film, but because I want to simplify to just a few films. There is a fair bit of front rise used on all these shots. I really like the Symmar 210mm as it has plenty of image circle for movements.
Red filter, black and white film
September 19, 2016
A quick test I did recently comparing the same scene photographed with a red filter over the lens, compared to the same scene with no filter. The car in the foreground was red, and the building in the top right was red brick. Despite what some people say, red filters used with black and white film will lighten red subjects as well as darkening blue. We can also see the loss of shadow detail as shadows have a lot of blue in them, e.g. the lower left corner shadow cast be the car. The film was Kodak Double-X 5222 rated at 400, exposed in a Nikon FE with 55mm lens. The filter was a standard Hoya red. Processed for 11 minutes in Rodinal 1+50.
4×5 project, August 2016 #6
August 30, 2016
4×5 project, August 2016 #5
August 27, 2016
Down to the final eight sheets, here is where I felt I had figured out Foma 200 and started to like it. This is rated at 100 and processed in Rodinal 1+50 for 8 minutes. Four sheets in a MOD54 holder in a 3 reel Paterson tank. Gentle agitation first 30 seconds, then 3 inversions per minute. In my normal processing these subsequent inversions take 10 seconds, however with the gentle agitation I use with MOD54, to stop sheets dislodging, it takes 15 seconds. Have not had any sheets move with this approach. The lens was a Symmar 210mm at f/32 at 1/8 second, using a fair bit of front rise, this lens has good coverage. It was another frustrating day for testing with the sky being about 70% clouds that gave flat light, then occasionally breaking to give direct sun as seen above. The scan below was from a sheet exposed a few minutes after the one above, when the clouds had settled back in. Shows why overcast flat light is no good for testing.
4×5 project, August 2016 #4
August 24, 2016
On this day I decided it would be a good idea to compare FP4 to CHS II, rating them both at 100 and processing for the same time together in the tank. A reasonable idea, however things didn’t go as I’d hoped. It was a sunny winters day which is good for this sort of comparison testing as I get directional, contrasty light. As I set out to look for suitable subjects I was a bit concerned about some clouds that were moving in. Overcast means flat, low contrast light; moving clouds can give fluctuating light levels so sequential exposures are not comparable. The sun lasted until I had set up my first shot and then was covered by clouds. I was waiting for it to reemerge, however for five or so minutes it didn’t change. I wanted to get the exposures done as I had set the tripod up on the road. It was a quiet road, and I was right against the gutter, but still a somewhat risky position. Therefore I felt compelled to take the photos just so I could move on to a more sensible location. In retrospect I should have abandoned that setup without using any film and moved on to something better. A poor decision made under self imposed pressure.
This is a red brick block of flats and when I first got there most of this side of the building was in direct sun. If that had held it would have been a useful comparison subject as I could have seen the contrast range that each film could record. The only contrast difference as it was taken is that the sky was much brighter than the ground, so I exposed for the building and decided to pull the developing. My stock dev time for FP4 is 9 minutes so 8 seemed reasonable. There isn’t much to see in the comparison, with FP4 on the left and CHS II on the right. The building has more local contrast in the FP4 whereas the CHS II looks a bit flatter. I do feel I can see more tones and tonal separation in the sky on the CHS II sheet, which is what Adox say is a characteristic of the film.
For the other two sheets I found a lookout that has a view across Sydney harbour to the CBD. It was still overcast and didn’t look like clearing up so I was just trying to get something exposed so I could develop the films that night. By the time I had the framing set up there was some weak sun emerging from the clouds but then being covered over again – fast moving clouds with few breaks. I decided to try to expose both sheets during the next bright period, so as soon as I saw a bit of contrast coming into the scene I quickly exposed first the CHS and then the FP4. Here I had misjudged again as the scene continued to brighten and after a minute or so the scene was in full sun that lasted for about ten minutes. By rushing it I had missed the best light and also had two exposures made in slightly different lighting conditions – the FP4 sheet is obviously a touch brighter and with more contrast than the CHS. However I can still see more tonal separation in the clouds on the CHS sheet despite the fact it was made in flatter light. So as far as getting some useful data on the differences between the films, I pretty much failed. On the other hand I did learn a lesson about being more patient, being prepared to abandon something that isn’t working, and trying to be more in tune with the light. I’ve also decided that CHS II needs different dev time than FP4, next time I will try 9.5 minutes.
4×5 project, August 2016 #3
August 21, 2016
On the third day (not necessarily consecutive days) I went to a park by the harbour and exposed four sheets of Adox CHS II, another film of which I’ve had a partial box hanging around for a while. Sometimes I buy films to try out of curiosity, expose ten or so sheets and then move on to something else. Now I’ve decided that I don’t want these partial boxes hanging around. I keep them in a fridge but eventually they will develop base fog if left for years. Even if they don’t fog I will have forgotten how to use them in regard to exposure and development. So as part of this project I will use up all these films, have a good look at them and decide whether I like them enough to buy more. At the moment, the only film that is a 100% certainty is Ilford FP4.
I bought a box of 25 sheets of the Adox CHS II back in 2013 when it first came out. I liked it then and I still do, however I find it very similar to Ilford FP4. I will do some side by side testing of the two films to see if I can discern any differences – I’ve read where Adox say it should be apparent in portraits of people with fair skin, and landscapes with blue skies and clouds. If I can see a difference I might buy more, otherwise I can’t see any reason to, particularly as I can buy FP4 for a better price. Still, well done to Adox for producing a new emulsion that works well and looks good. This park exposure was made with a Symmar 210mm at f/45 on a Chamonix 045N2 camera. Processed for 9 minutes at 20 degrees in Rodinal 1+50 – the same time I use for FP4.
Symmar 210mm at f/5.6
